Unity Plugin
Aviator Arcade Plugin Guide for Unity
This tutorial provides step-by-step instructions to install, configure, and integrate the Aviator Arcade plugin into your Unity project. The plugin consists of two DLLs and requires some configuration to work seamlessly with WebGL and the Unity Editor.
Only Unity version 6 and above is formally supported by the Aviator Arcade plugin.
Installation
- Add the Unity Package to Your Project
- In Unity, go to
Assets > Import Package > Custom Packageand select the downloaded Unity package. - The package will be imported into your project. Make sure it is in the plugins folder.

Configuration
- Create an Aviator Arcade Account
- Navigate to the Aviator Arcade website.
- Register for an account.
- Once registered, request developer access via your account settings.
- Create a New Project
- After logging into your Aviator Arcade account.
- Create a new project.
- Once the project is created, you will receive an API key. This key is essential for configuring the plugin.
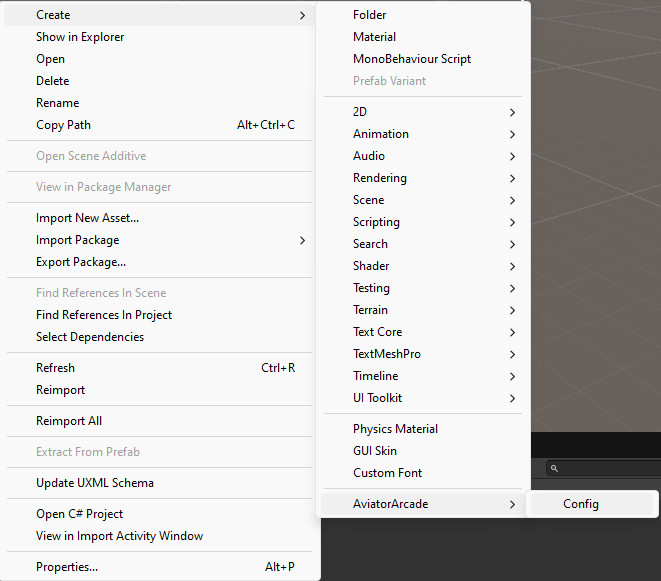
- Configure the Plugin
- In Unity, create a
Resourcesfolder and create a configuration. Locate the plugin’s configuration menu. Navigate toAssets > Create > Aviator Arcade > Config.
- In Unity, create a
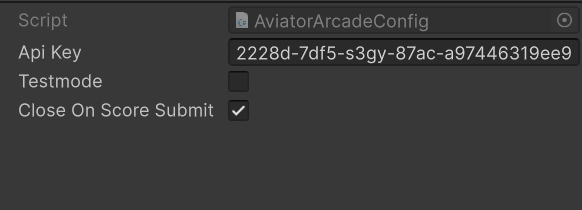
Open the configuration resource and enter your API key.
If the Resources folder does not already exist, try creating a new one and placing the asset inside of it.
Integration
Initialize the Plugin
To initialize the Aviator Arcade API, create a new instance of AviatorArcadeApiManager in your script:
// Example code snippet for initialization
AviatorArcadeApiManager apiManager = AviatorArcadeApiManager.Instance;
This initialization step ensures:
- The game validates the provided
gameIDanduserID(automatically handled by Aviator Arcade). - The system checks if the required payment in Aviator Tokens has been made to play the game.
Start the Game
Once everything is validated, call the startGame function at the appropriate point in your game (typically when gameplay begins):
// Example code snippet to start the game
apiManager.startGame();
Send the Score
At the end of the game, once the final score is known, call the SendScore function to submit the score to the Aviator Arcade platform:
// Example code snippet to send the score
apiManager.SendScore(finalScore);
This function sends the score to the platform, where it will be processed and registered. During this process, the platform performs several checks to ensure the score is valid and prevent invalid submissions.
Testing the Integration
- Use the Unity Editor to test the integration.
- Monitor the Debug Log for any errors or issues.
- Verify that the initialization,
StartGame, andSendScorecalls function as expected during gameplay.
With these steps completed, your Unity project is now fully integrated with the Aviator Arcade platform. You can focus on developing and testing your game with confidence. Happy coding!
Troubleshooting
Set DLL Compilation Targets
Locate the two DLLs included in the package:
- One DLL is in the
Releasefolder. - The other DLL is designed for use in the Unity Editor.
- Set their compilation targets:
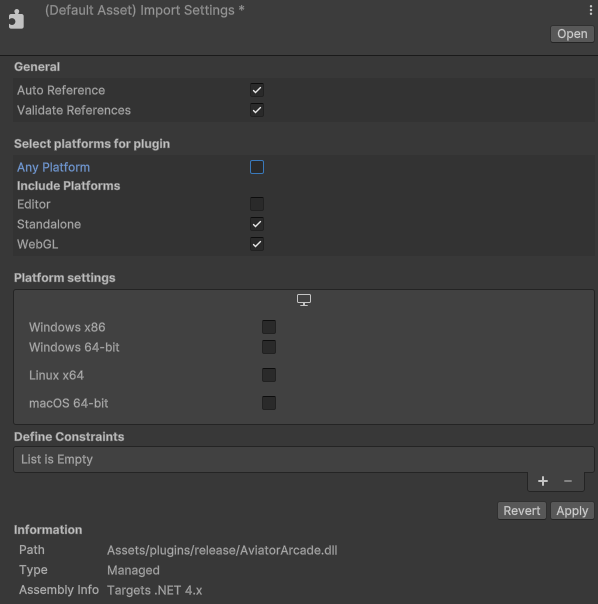
- Release DLL (WebGL)
- Right-click on the DLL in the Unity Project window.
- Select
PropertiesorInspector. - Ensure the DLL is set to compile only for WebGL by adjusting the platform settings.
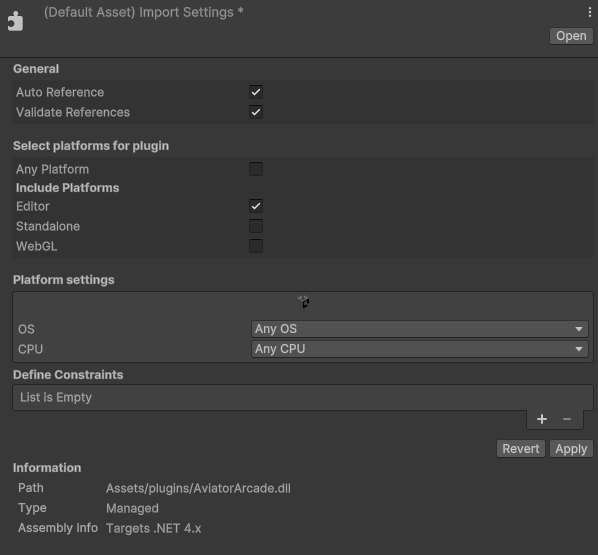
Editor DLL
Right-click on the Editor-specific DLL. Set this DLL to compile only for the Unity Editor.
Plugin Reference
Functions
public async void startGame()
Starts the game
public async Task<Nft[]> GetNFTs()
Returns current user's NFTs
public async Task<GameInfo> GetGameInfo()
Returns current game information
public async Task SendScore(int score)
Sends score to the Aviator Arcade API
Types
public class GameInfo
{
    public string _id;
    public string projectId;
    public string projectVersionId;
    public string user;
    public bool isStarted;
    public bool isStopped;
    public string userId;

    public GameInfo(string _id, string projectId, string projectVersionId, string user, bool isStarted, bool isStopped, string userId)
    {
        this._id = _id;
        this.projectId = projectId;
        this.projectVersionId = projectVersionId;
        this.user = user;
        this.isStarted = isStarted;
        this.isStopped = isStopped;
        this.userId = userId;
    }
}
public class Nft
{
    public string name;
    public string contractAddress;
    public string tokenId; // Changed to string to match the JSON
    public string image; // Changed to string to match the JSON

    public Nft(string name, string contractAddress, string tokenId, string image)
    {
        this.name = name;
        this.tokenId = tokenId;
        this.contractAddress = contractAddress;
        this.image = image;
    }
}